

Member Management & Permissions
To operate the AI system effectively, AIHive allows you to invite colleagues to join your Workspace with different roles and permissions, ensuring security and specialization.Inviting New Members
To add personnel to the system, follow these steps:Step 1: Access the Management Page
- On the main interface of Builder mode, click on Members in the left sidebar.
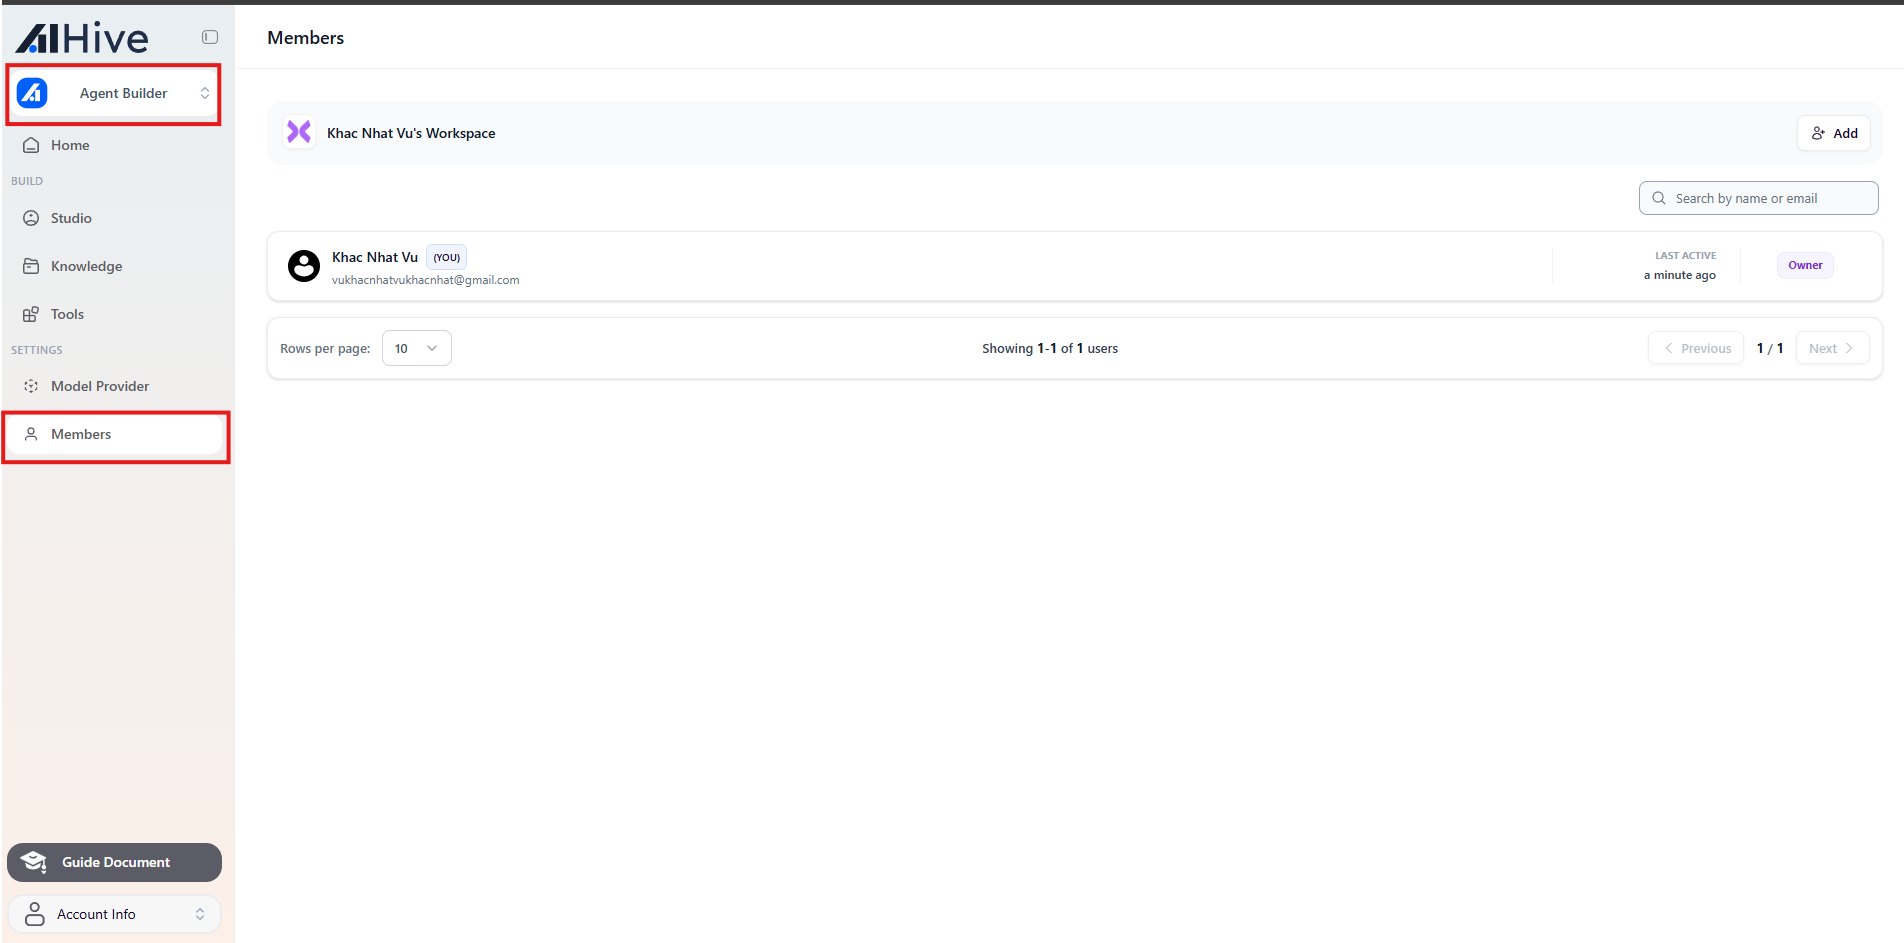
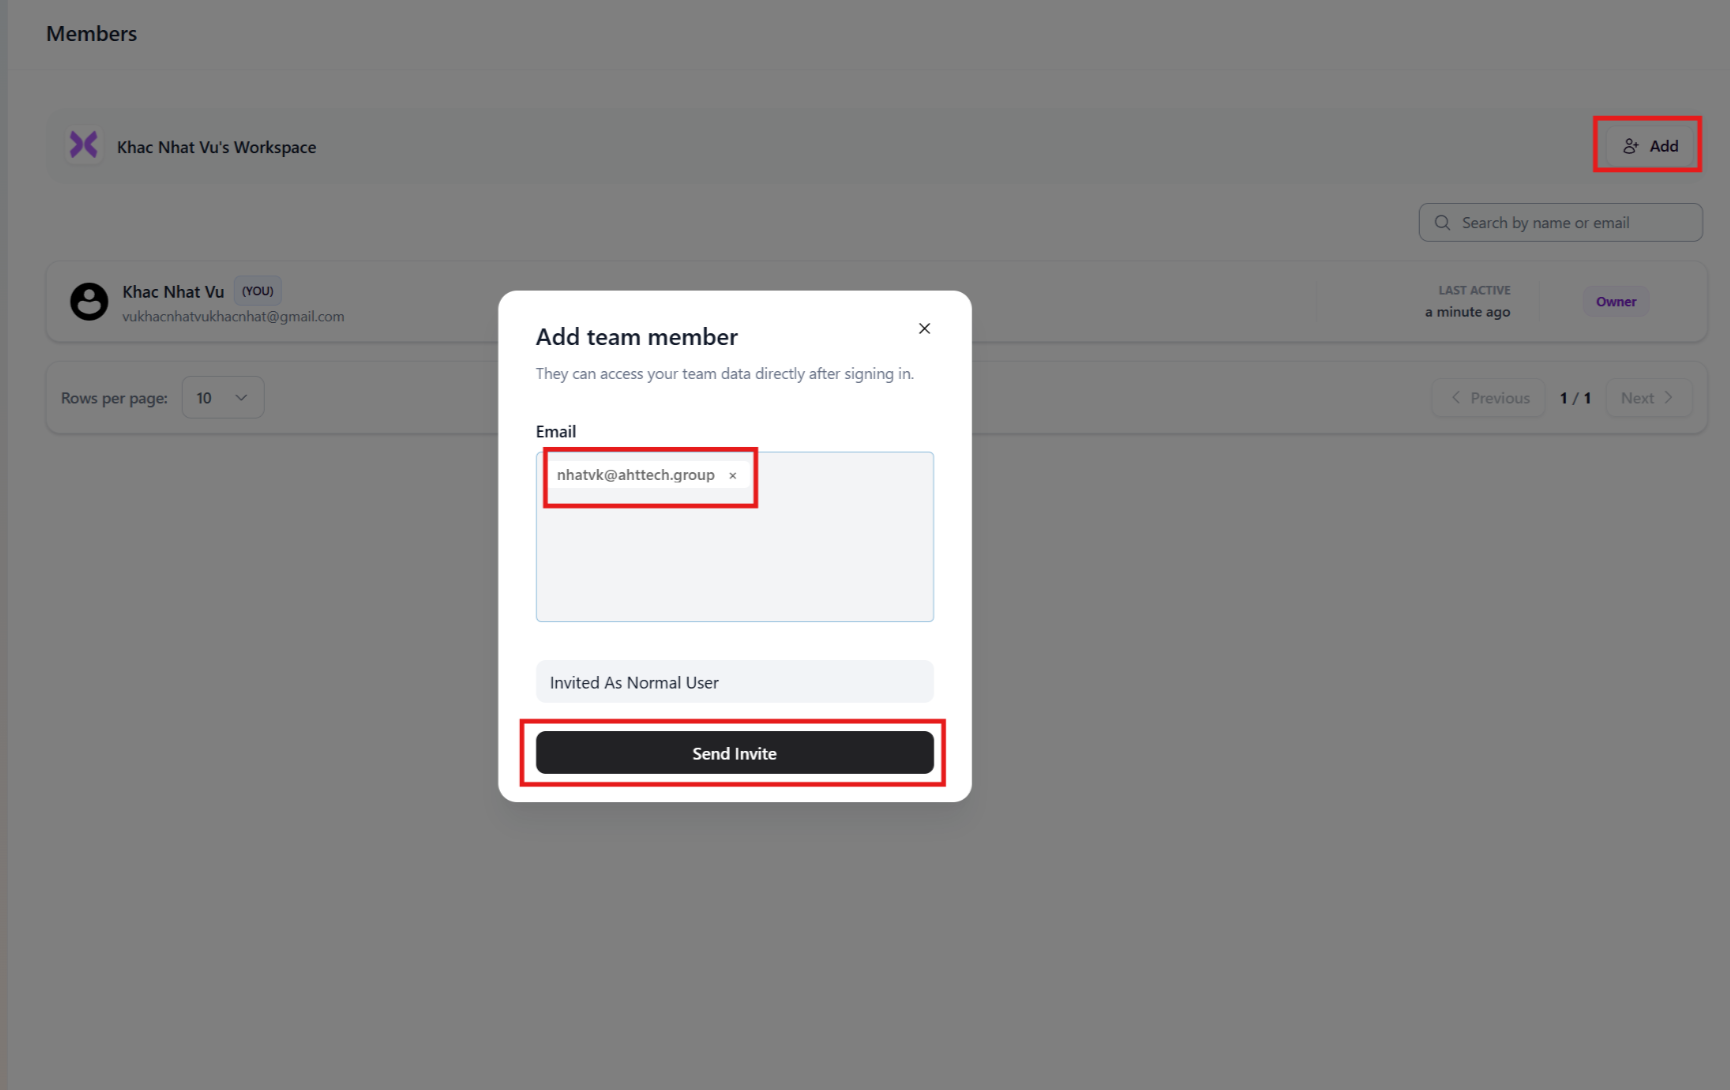
Step 2: Send an Invitation
- Click the + Invite Member button in the top right corner.
- Enter the Email of the person you want to invite.
- Important: Select the appropriate Role for them (See detailed role descriptions in Section 2).
- Click Send.
Roles & Permissions Explained
AIHive divides permissions strictly to ensure data security. Below is the detailed permission table: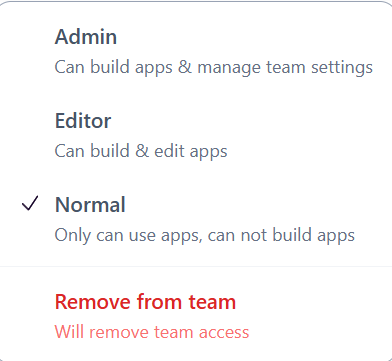
Managing Existing Members
You can change permissions or remove members at any time.Change Role
- In the member list, find the person you want to modify.
- Click on their current role (e.g., Editor).
- Select the new role from the dropdown. The system will save automatically.
Remove Member
- Click the Trash icon (or three dots -> Remove) at the end of the member’s row.
- Confirm removal.
Note: After removal, that person will lose access immediately. Agents created by them will remain in the Workspace.
