

Messenger Integration
Connect Facebook Messenger is the standard process to integrate AIHive with your Fanpage, enabling the Bot to automatically respond to customer messages.Implementation Process
Step 1: Publish Agent
Before connecting, ensure your Agent is ready.- On the Agent configuration interface, click the Publish button in the top right corner.
- The system will save all your latest Prompt, Knowledge, and Tools configurations.

Step 2: Access the Integration Menu
- In the left menu bar, find and click on Integrations (or Channels depending on the version).
- Find the Facebook Messenger card.

Step 3: Login to Facebook
- Click the Connect button on the Facebook card.
- A popup window appears. Click “Continue as…” to log in with the personal Facebook account that manages the Fanpage.

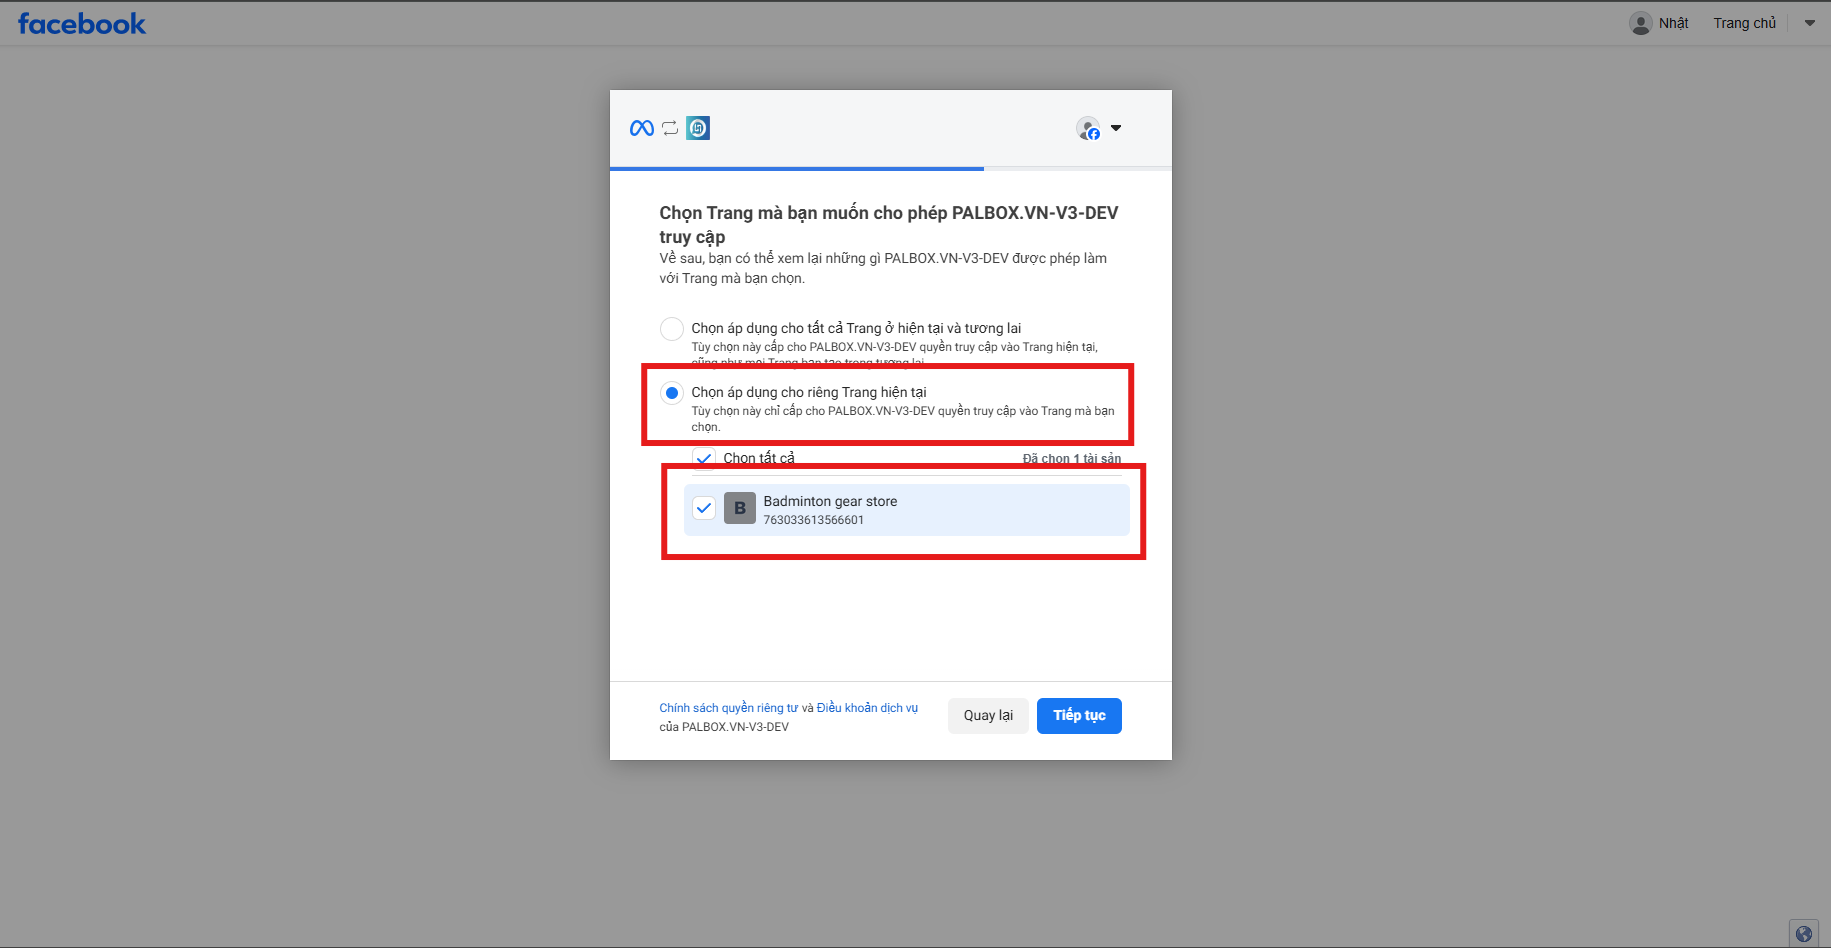
Step 4: Grant Page Management Permission (Important)
This is the most critical step.- Select “Edit previous settings” (if you’ve connected before) or select from the new Page list.
- Crucial: Check the box “Apply only for the current Page”.
- Tick the exact Fanpage you want to integrate this Agent with.
- Click Next and grant all required permissions (Manage Page, Send Messages…).
⚠️ Note: If you do not grant full permissions, the Bot may not be able to read or reply to messages.

Step 5: Complete
- After granting permissions, click Save / Done.
- Return to the AIHive screen, you will see the Fanpage status change to Connected (Green).

Testing
After a successful connection, verify the integration:- Open the Facebook or Messenger app on your phone.
- Go to the connected Fanpage.
- Act as a customer and send a test message (e.g., “Hello”).
- If the Bot responds immediately -> You’ve succeeded! 🎉