> ## Documentation Index
> Fetch the complete documentation index at: https://docs.aihive.global/llms.txt
> Use this file to discover all available pages before exploring further.
# AI Studio Interface
> AI Studio Interface - AI Hive Documentation
# Getting Familiar with the Studio Interface
Studio is the main control center of AIHive. Immediately after logging in, you will be taken to this overview Dashboard screen.
Let's get familiar with the main functional areas.
## Screen Overview
The Studio interface is designed minimally, divided into 2 main areas:
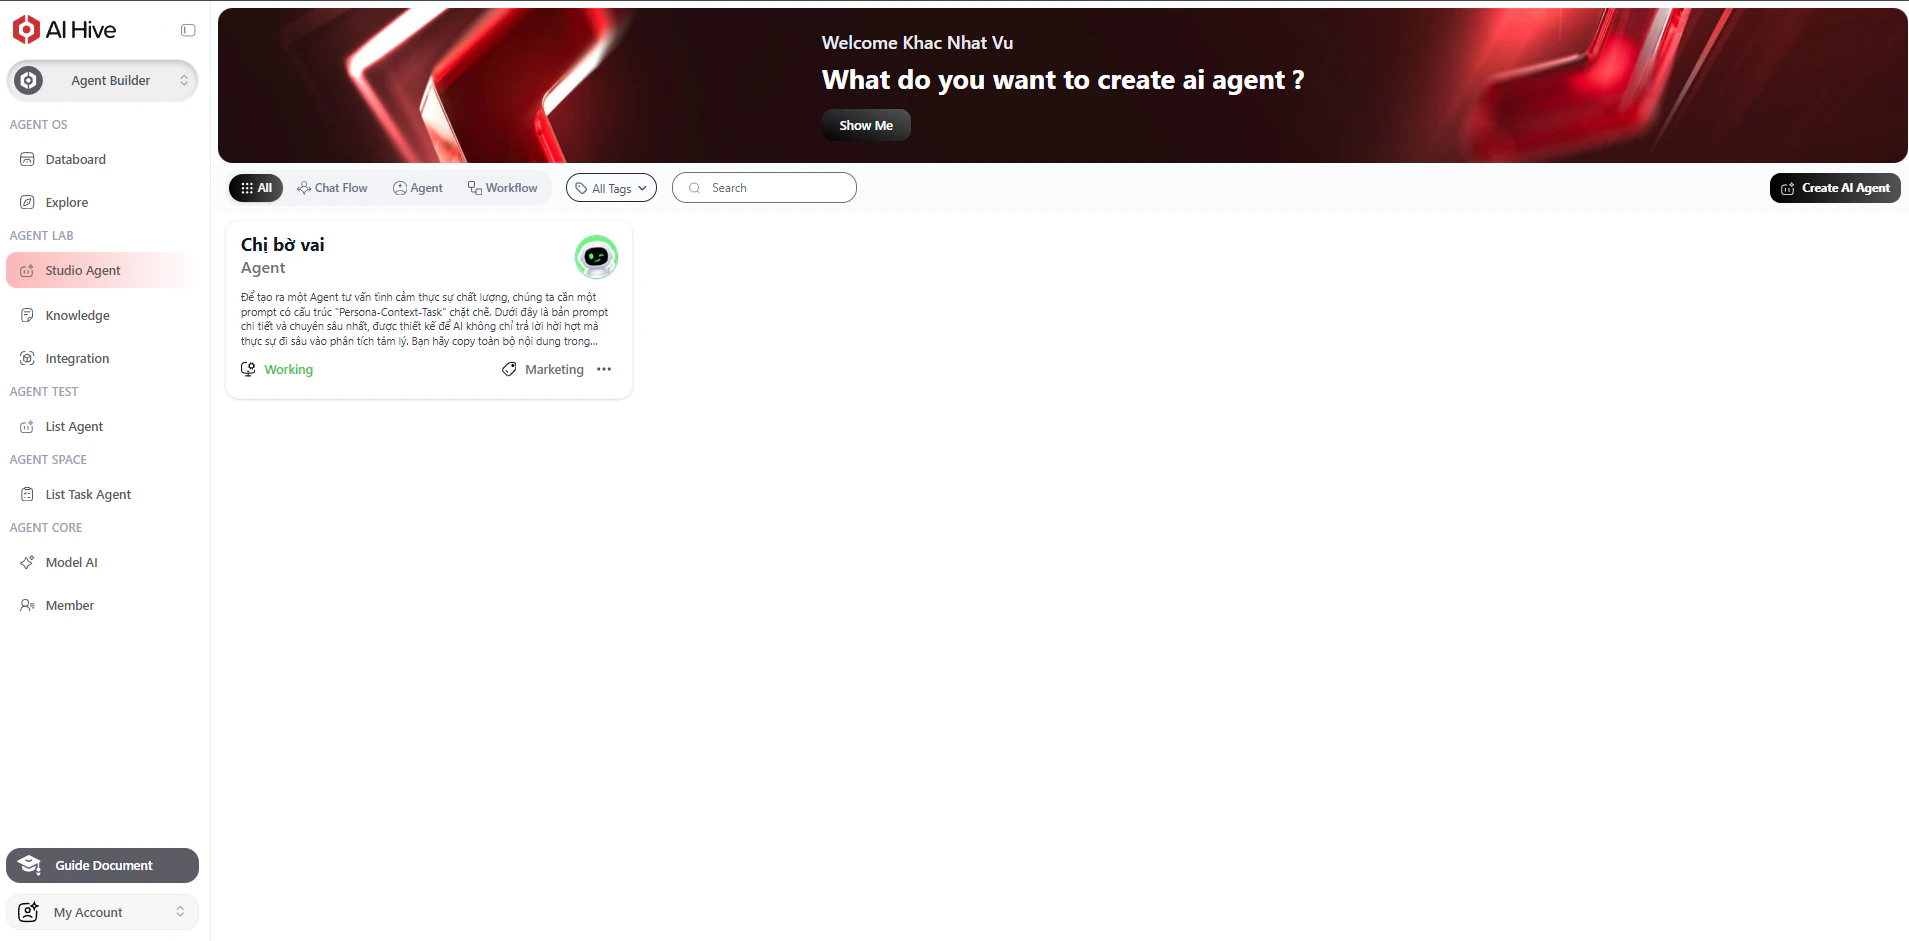 *AIHive Studio overview interface*
* **(A) Navigation Bar (Sidebar):** Located on the left, contains the menu to access system modules.
* **(B) Main Workspace:** Takes up most of the screen, displays the list of Agents and Flows.
***
## Left Navigation Bar (Sidebar)
This is where you switch between 2 modes: **Builder** and **Agent User**.
*AIHive Studio overview interface*
* **(A) Navigation Bar (Sidebar):** Located on the left, contains the menu to access system modules.
* **(B) Main Workspace:** Takes up most of the screen, displays the list of Agents and Flows.
***
## Left Navigation Bar (Sidebar)
This is where you switch between 2 modes: **Builder** and **Agent User**.

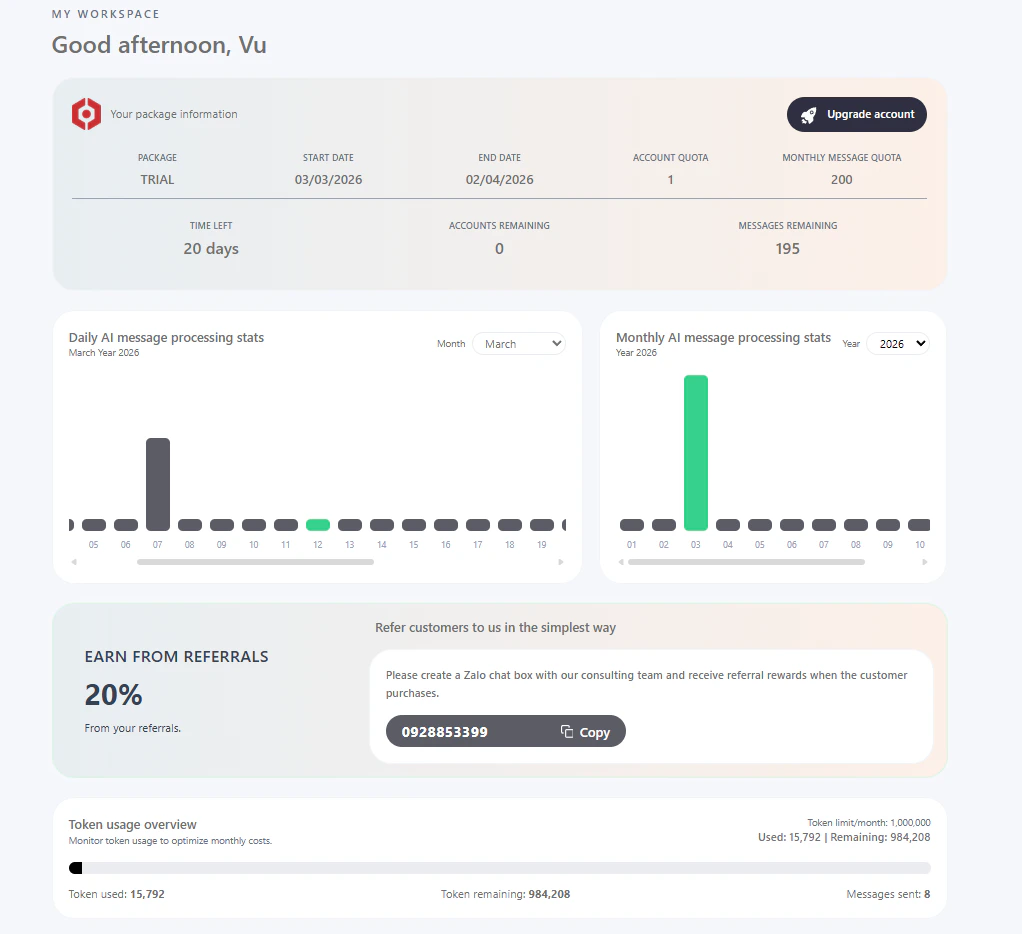
 ### Home
* **Your Plan Information**
* **Statistics**
* **Token Usage Overview**
### Home
* **Your Plan Information**
* **Statistics**
* **Token Usage Overview**
 ### Build
* **Studio:** (Currently selected) Screen for managing the current Agent list.
* **Knowledge:** Where you upload data (Files, Links) to train the Bot.
* **Tools:** Additional utilities (Tools).
### Settings
* **Model Providers:** Connect API with AI Models (GPT, Gemini...).
* **Members:** Team management and permissions.
### Utilities
* **Documentation:** Link to the support Docs page.
* **Account Information:** Button at the bottom corner, contains personal information and Logout button.
***
## Project Management Area (Workspace)
The central area displays all the "products" you have created as cards.
### Build
* **Studio:** (Currently selected) Screen for managing the current Agent list.
* **Knowledge:** Where you upload data (Files, Links) to train the Bot.
* **Tools:** Additional utilities (Tools).
### Settings
* **Model Providers:** Connect API with AI Models (GPT, Gemini...).
* **Members:** Team management and permissions.
### Utilities
* **Documentation:** Link to the support Docs page.
* **Account Information:** Button at the bottom corner, contains personal information and Logout button.
***
## Project Management Area (Workspace)
The central area displays all the "products" you have created as cards.
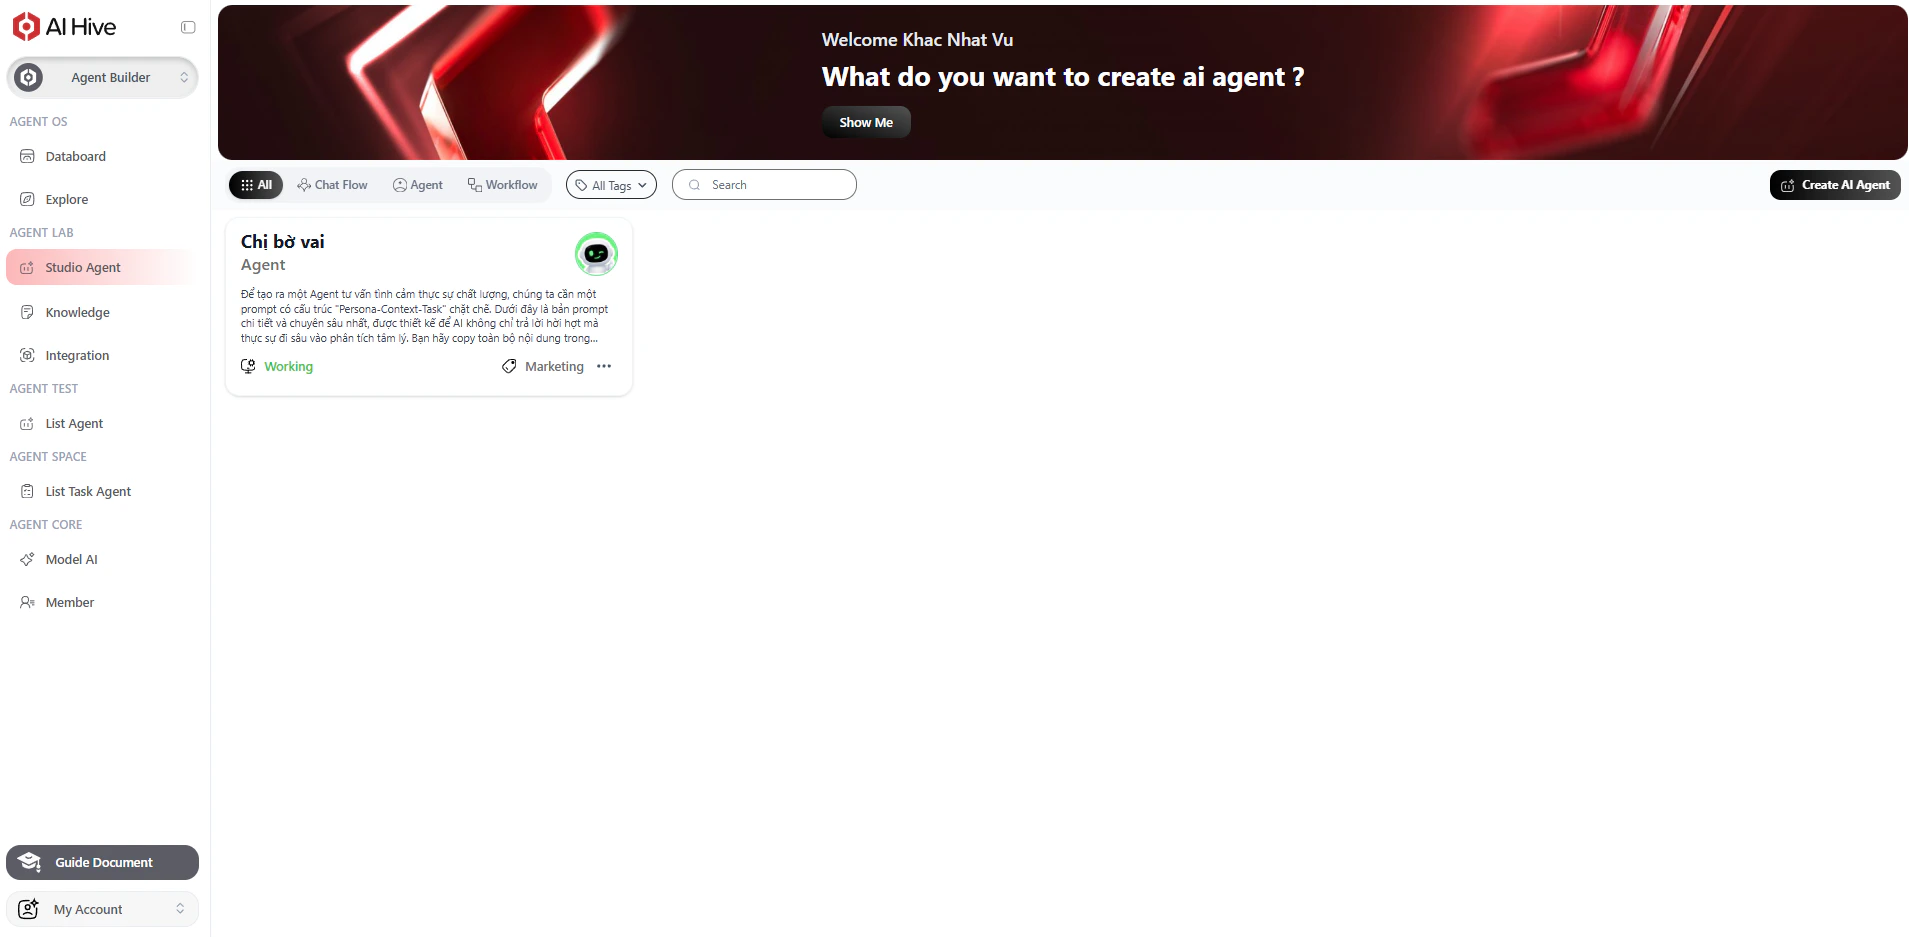 ### Filter Toolbar (Top Bar)
At the top of the list are tools to help you search quickly:
* **Search Box:** Enter the bot name to filter quickly.
* **Classification Tabs:**
* **All:** Display everything.
* **Chat Flow:** Show only conversation flows.
* **Agent:** Show only AI assistants.
* **Completed / Workflow:** Other statuses.
### Project Card
Each project is displayed as a card with complete summary information:
* **Icon & Name:** Helps identify quickly (Example: *AI AGENT - FASHION CONSULTANT*).
* **Type (Tag):** Small label clearly stating `AGENT`, `CHAT FLOW` or `WORKFLOW`.
* **Description (Prompt):** (For Agent) Displays a short excerpt from the Prompt so you know what the bot does.
> Example: The "AI AGENT - FASHION CONSULTANT" card displays description: "# Please role-play as a sales consultant closing orders..."
***
### Filter Toolbar (Top Bar)
At the top of the list are tools to help you search quickly:
* **Search Box:** Enter the bot name to filter quickly.
* **Classification Tabs:**
* **All:** Display everything.
* **Chat Flow:** Show only conversation flows.
* **Agent:** Show only AI assistants.
* **Completed / Workflow:** Other statuses.
### Project Card
Each project is displayed as a card with complete summary information:
* **Icon & Name:** Helps identify quickly (Example: *AI AGENT - FASHION CONSULTANT*).
* **Type (Tag):** Small label clearly stating `AGENT`, `CHAT FLOW` or `WORKFLOW`.
* **Description (Prompt):** (For Agent) Displays a short excerpt from the Prompt so you know what the bot does.
> Example: The "AI AGENT - FASHION CONSULTANT" card displays description: "# Please role-play as a sales consultant closing orders..."
***